Did you like the Bullseye Quilt Block?
Well if so you are in luck............
Today's terrific post is a tutorial on how to make
one of your very own.
 |
| Blue is one of my favorite colors. This quilt is named Bullseye Blues and is still in pretty good condition considering it is over 10 years old and is used daily in the cool months here in Phx. The kids took this quilt to camp and it is regularly used for bonfires! |

In this tutorial I am showing you a Sunflower bullseye block.
However you can choose any color way you like.
In the above blocks I chose an assortment of gray
fabrics to use for my base square and a wide assortment of
bright fabrics to make the bullseyes.
 |
| Required for each block: One 9' base square one 8" circle one 6" circle one 4" circle |
(yah, I know....I should have chosen a light
blue, but I probably used what I had on hand!)
The 8" green circle is the leaves
The 6" yellow circle is the flower
and the 4" brown circle is the flower center.
 |
| How do you cut the circles? I made 8", 6" & 4" templates cut from cardboard boxes and then drew around these circles on the back of my fabric with a pencil then cut them out. |
 |
| Before I begin sewing I fold each square and circle in half, then quarters and finger press or iron a crease. This gives me a placement line. I want each circle placed in the center. You can't really see this in the picture above but the crease lines are there. |
 |
| After creasing your placement lines and positioning your 8" circle you will sew 1/4" around the edge of the circle. |
 |
| Turn your square over and carefully cut away the extra fabric. This picture show a roughly cut circle cut approx. 1/4" from sewing line |
 |
| Repeat for each circle |
 |
| This is what the back side looks like after you sew and cut away each circle |
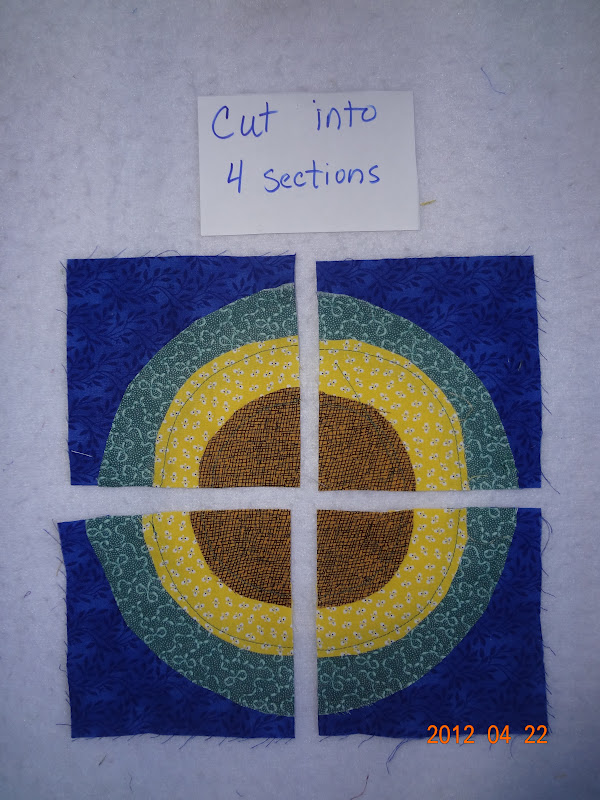 |
| Cut each block into 4 equal sections |
 |
| Make a bunch of these blocks so when you cut them into 1/4" you can mix and match them. |
That's it for tonight...........
Have a blessed evening,
tammy
I love when something LOOKS complex but turns out to be fairly easy once you know the trick. When I looked at your quilts the other day, I thought the pieces were individual strips of arches. Layered circles -- pretty slick!
ReplyDeletePhew! Individual arcs would be HARD!
DeleteI, too, love a quilt that looks like it was complicated to do
but actually really easy!
Those are beautiful quilts. If only I had the patience and fortitude to stick with such a project.
ReplyDeleteLucy